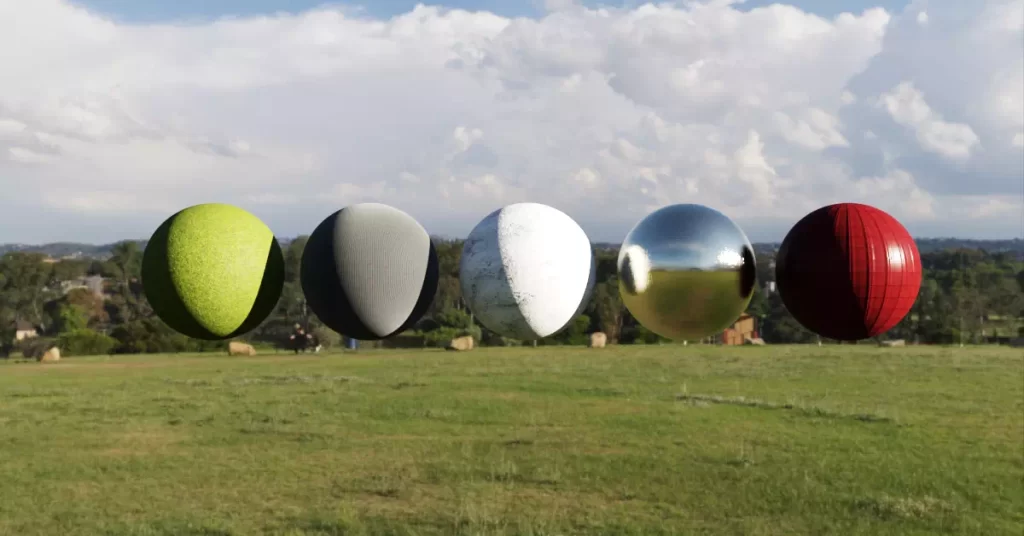


What are PBR materials?
PBR stands for Physically Based Rendering. It essentially helps you simulate any existing material and even a mix of several ones with a single unified compact format.
It is based on the same principal idea – “Render stuff as accurately as possible” with high quality materials.
PBR materials range from 1K resolution all the way to 8K. There are even materials that go up to 16K and beyond but that’s not required if you ask me.
The higher resolution, the more memory it’s going to take on your system. It’s best to stick in the range of 2K to 4K if you’re just starting out with PBR materials.
An 8K material can occupy up to 1gb of space. So 16k would definitely be a whole lot more.
PBR Materials in Vray 5 for Sketchup
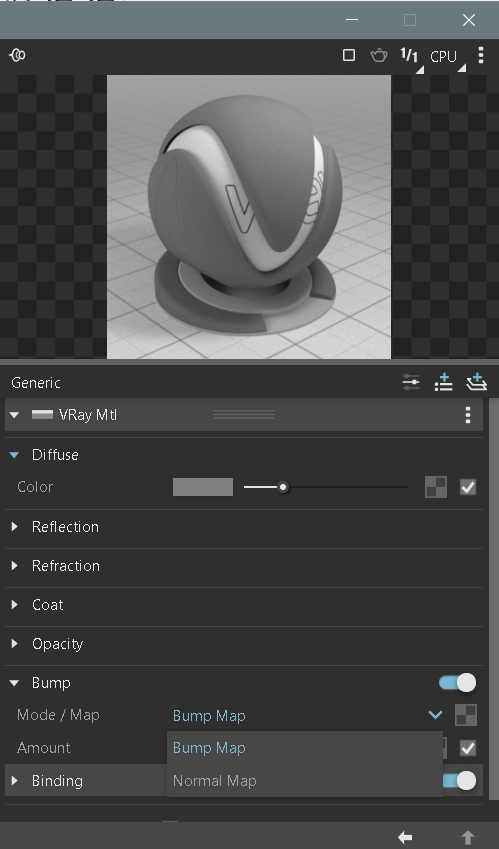
In the previous version of Vray, we used to have dedicated materials called “metallic material” or even “PBR material” to create our PBR materials.
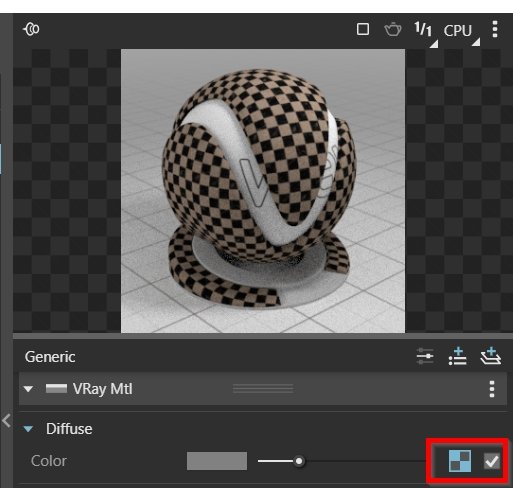
But with the latest version which is Vray 5, you can start adding PBR Material maps directly to the “Generic” material map slots. Let’s look at each of these map slots and what each of these maps mean below.
What are the various maps within PBR materials?
Once you download your PBR material from websites like poliigon, you will notice that the PBR zip files consists of various maps.
These maps are the textures that give the PBR material it’s realistic feel. Let’s look at each one of them and also learn how to apply them in Vray for Sketchup.
Diffuse Map
A Diffuse map is the most common kind of texture map. It defines the color and pattern of the object. Mapping the diffuse color is like painting an image on the surface of the object.
For example, if you want a wall to be made out of concrete, you can choose an image file with a seamless concrete pattern. It is essentially the main color image of your material.
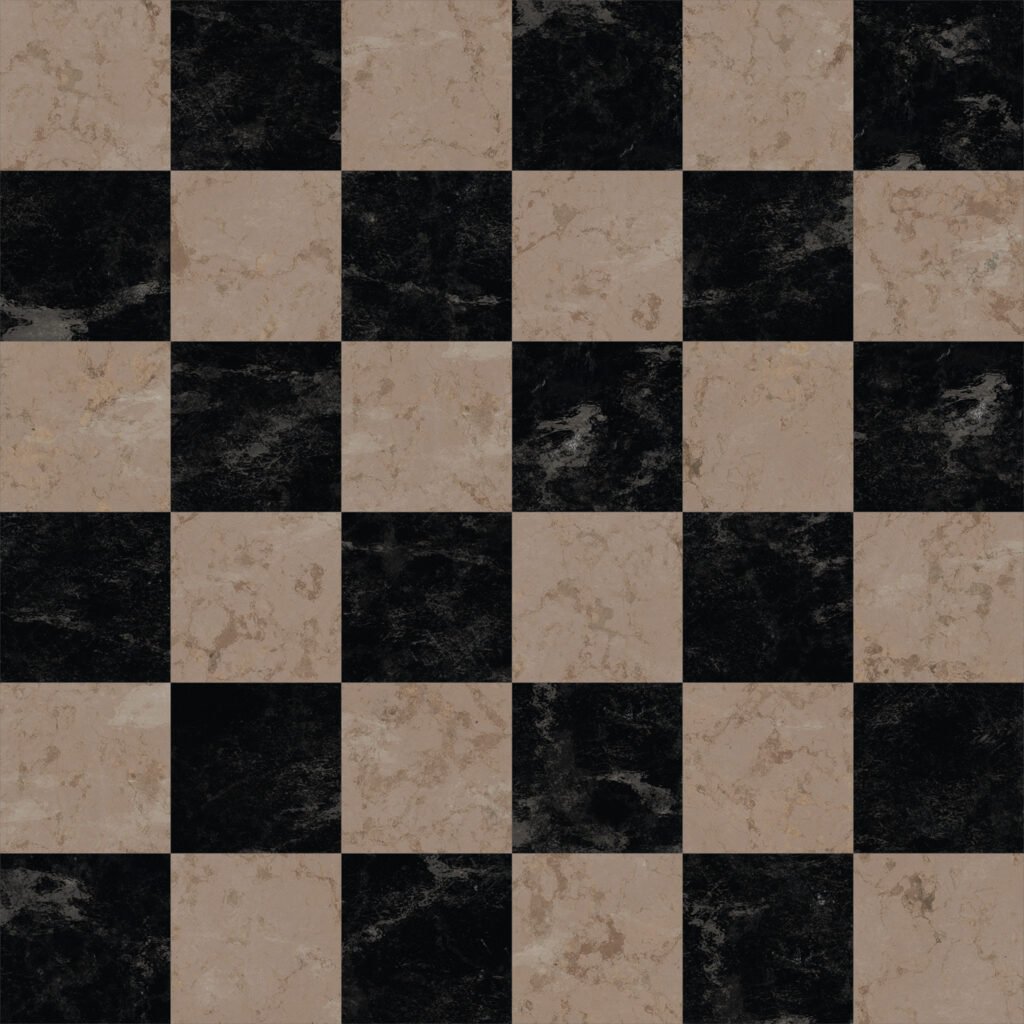
When you download the diffuse map from the above mentioned websites, it will generally be called “Color”. Here are some examples of what diffuse maps look like
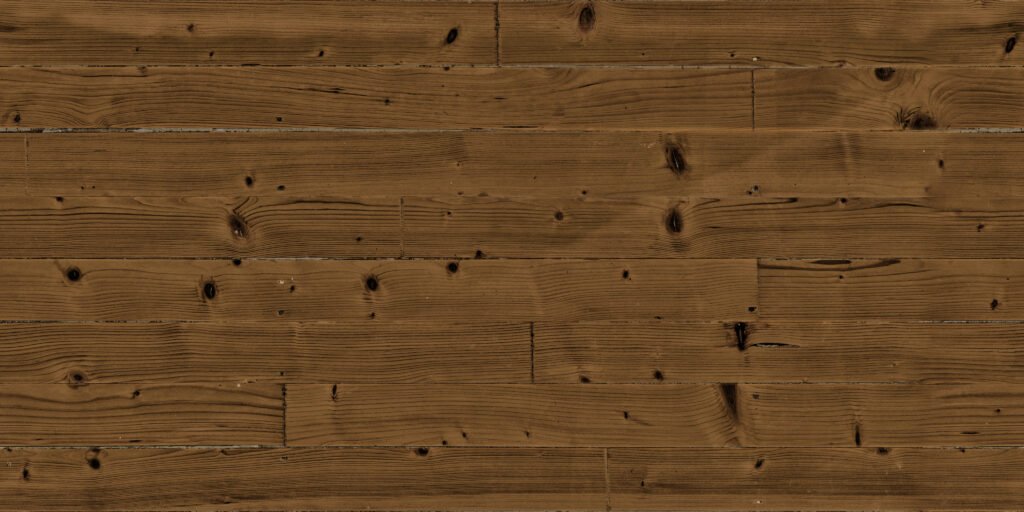
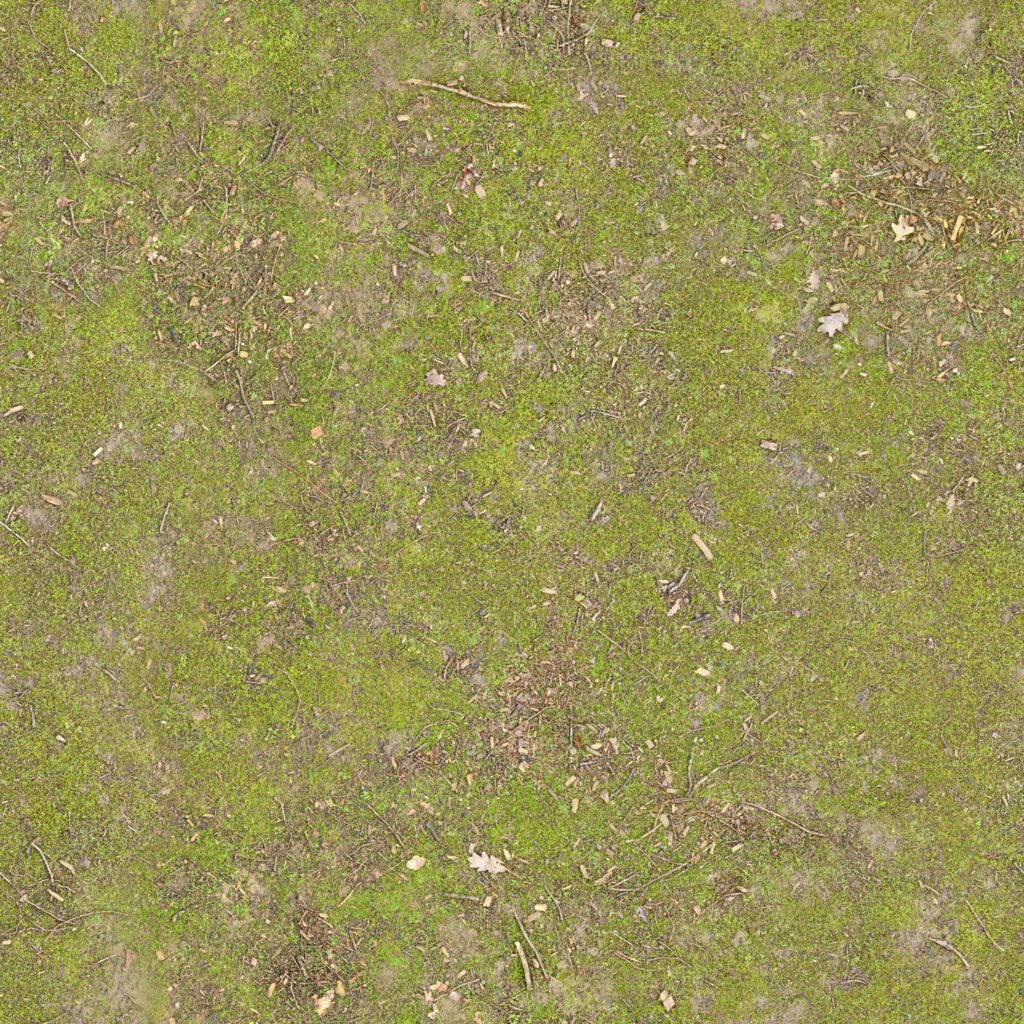
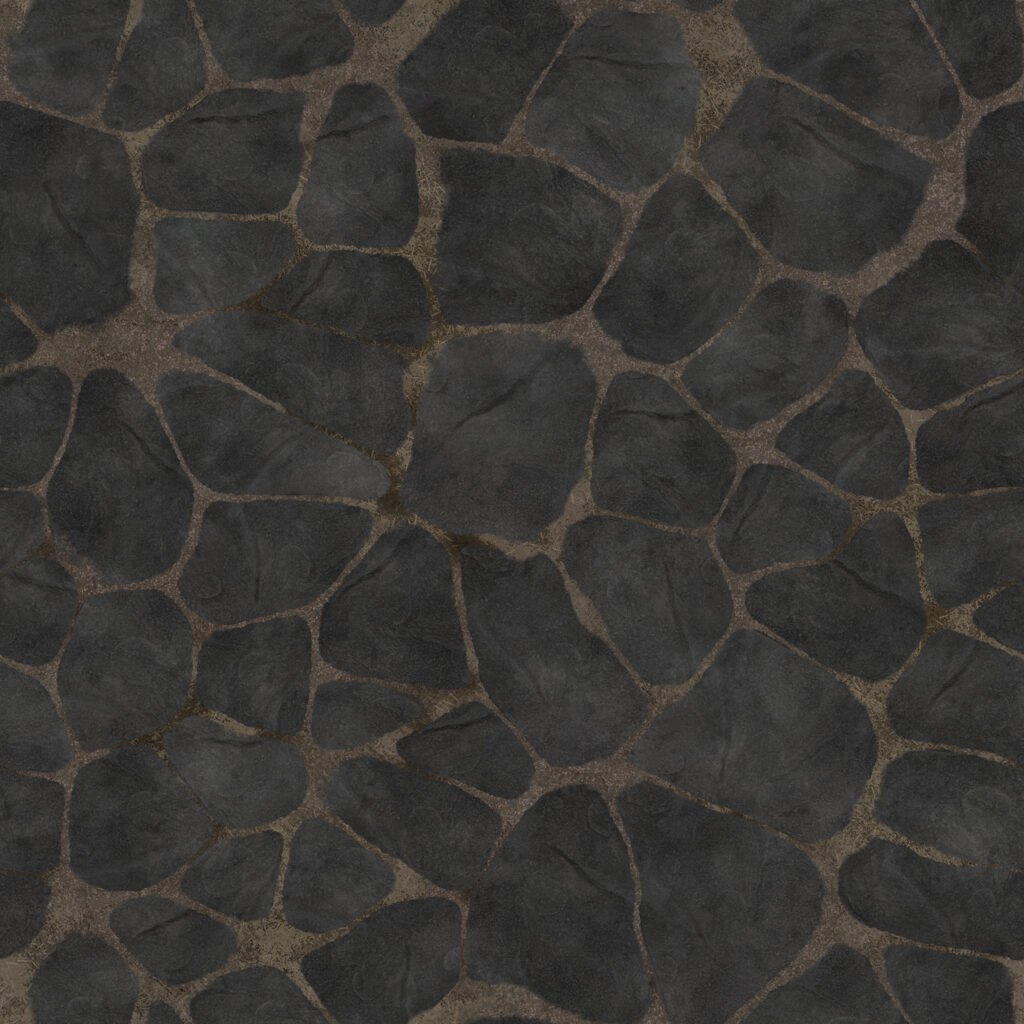
These maps need to be added to the diffuse texture slot.
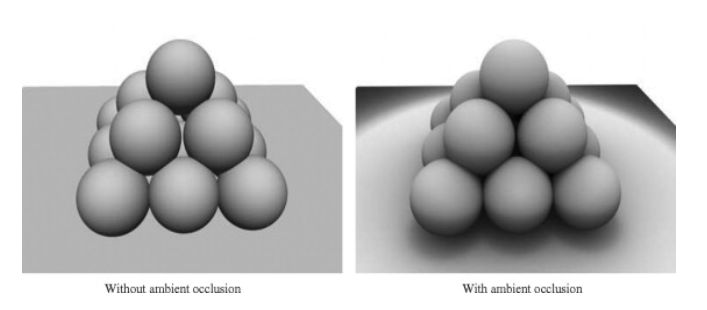
Ambient Occlusion Map
An ambient occlusion map is used to calculate how much indirect lighting an object receives.
Basically this map is used to compute the amount of shadows that would be cast by the overall ambient lighting in the scene against a chosen object, and also from reflections.
You can use this map to highlight or add detail to your shadows on objects. Sometimes if using this map in a program without an AO slot, you can overlay this on your diffuse map in a photo editing software to add shadow highlights.
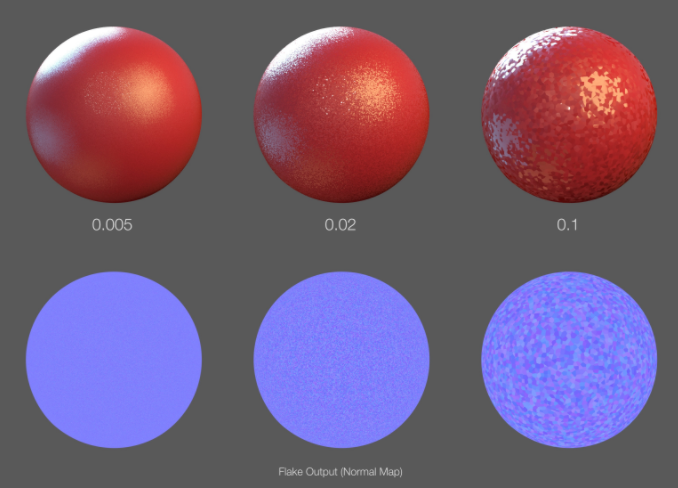
Normal Map
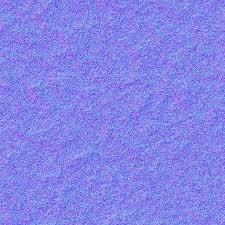
A normal map is added to a v-ray material to simulate lighting on bumps or dents. The reason it is colored is because the x, y, and z information of the map correspond to the RGB values of the bumps and dents.
This is important because the more polygons inside of a rendering, the more computations your computer has to do. By using a normal map to add bumps, rather than actually adding bumps to your geometry, your renderings will run much faster.
To add a ‘Normal Map’ you need to scroll down to the bump parameters in your material editor and select the normal map option.
You can also adjust the amount of visible bump to give your material a more realistic look.
Bump Maps – Bump maps are similar to normal maps, but instead of storing the bump information in RGB format, they store the information in black and white.
As a general rule, if you have a normal map, you should use that as it contains more information, but if you don’t, a bump map will give you a similar result and would be loaded in the same slot as a normal map.
Various scale defintion of flakes added to a normal map
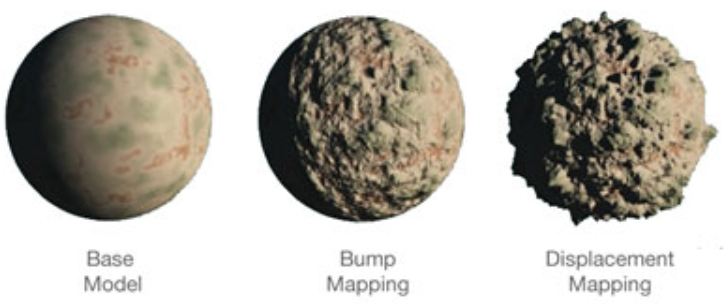
Displacement Map
A normal map uses RGB values to simulate bumps or dents in an object whereas, a ‘Displacement Map’ is instead used to deform the mesh or object itself. The normal map simulates movement, but a displacement map actually moves the points inside of your object.
This is used for areas where actual shape of mesh is important, but it also comes at a much higher processing and render time cost.
Use sparingly. Generally, a normal map would suffice to create an illusion of displacement rather than using a displacement map itself
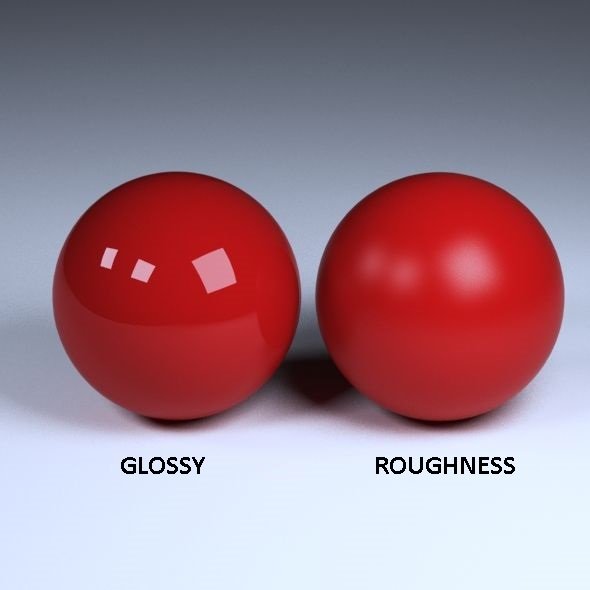
Gloss or Roughness Map
This map defines the smoothness of a surface , which thereby determines how much light different areas of the surface reflect.
Sometimes they are called ‘Roughness Maps’ and determine where light should not be reflected.
To switch between the reflection glossiness and roughness settings you will have to click on the ‘Surface Control’ tab under reflections menu and chose either option depending on the surface feel you are trying to achieve.
I’m sure you guys are excited to try out the PBR materials now that you have a better understanding of the maps and how to place them affectively .
If you would like to create photorealistic renders of your favorite spaces, please do check out our premium Sketchup & Vray Course for Interior Design


4 Responses
Your lectures is superb, very understandable and educating for me as a beginner.
Thanks,
FRED
Thanks Alfredo. Glad to hear you found my content useful 🙂
I have a question. What is the difference between a NormalGL map and a NormalDX map?
Difference between gloss and refl map?????